Create Custom Integration
There is a special developer-friendly system of creating your own integrations introduced to the Lagom theme. Follow the below steps to easily modify template elements and add your custom footers and headers as well as code displayed at <head>.
Create custom header
TIP
Inside of every layout folder in the main file templates/lagom/core/layouts/layout_name/layout_name.tpl there is an include that allows to display your own html code above the header of the lagom catalogue. In case you wish to change the position of your code, it is advised to create your own layout - only then the update of the Lagom theme will not override your changes.

- Open the file of the selected layout, where you wish to add a custom header in
templates/lagom/core/layouts/directory or create your own layout. - Create a file named
header.tpl. - Paste the HTML code which you wish to add.
- Adding style sheets to your own code has been described here
Create custom footer
TIP
The file located at templates/lagom/footer.tpl directory contains an include that allows to display your own HTML code instead of a standard Lagom footer.
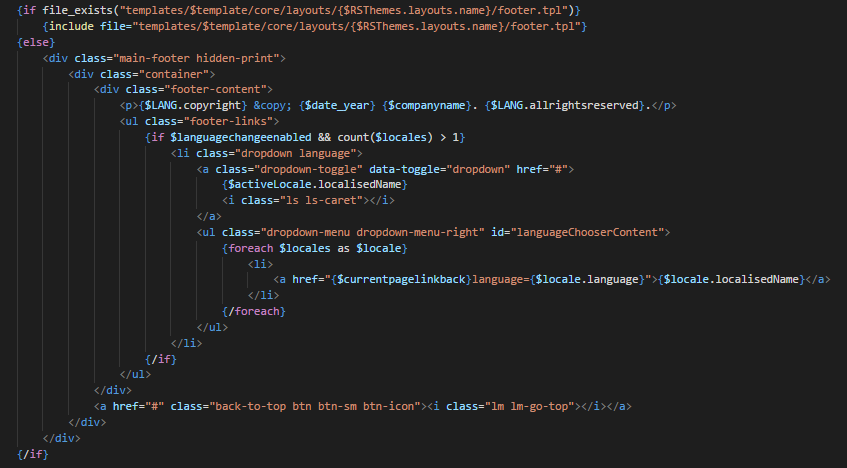
- Open the file of the selected layout, where you wish to add a custom footer in
templates/lagom/core/layouts/or create your own layout. - Create a file named
footer.tpl. - Paste the HTML code which you wish to add.
- Adding style sheets to your own code has been described here
Custom code included in <head>
TIP
File located at templates/lagom/includes/head.tpl directory contains an include that allows to display your own HTML code within the <head> tag

- Open the file of the selected layout, where you wish to add a custom head in
templates/lagom/core/layouts/or create your own layout. - Create a file named
head.tpl. - Paste the HTML code which you wish to add.
Modify Template Elements
TIP
The list of files with template elements that can be modified:
templates/lagom/includes/- all.tplfilestemplates/lagom/store/- all.tplfilestemplates/markdown-guide.tplsupportticketsubmit-customfields.tplsupportticketsubmit-kbsuggestions.tpltwitterfeed.tplviewemail.tplwhois.tpl
In the Lagom template you can also create templates for individual pages. Click here for more information.
- Find the file with the element you want to modify and create the
overwritesdirectory in the same exact place where this file is located. - In the
overwritesdirectory create a new.tplfile that will have the same name as the file you want to modify. - Open the file that you wish to modify and copy the code from the conditional statement located directly after the
{else}tag.
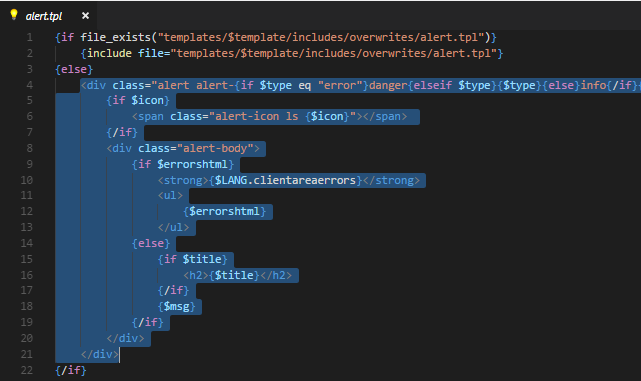
Paste it to the.tplfile you created earlier on and apply the desired modifications or add your own code.
WARNING
Be extremely careful when modifying the template code as each bug may lead to numerous malfunctions and interrupt the smooth management of the theme or even disable its functioning entirely.
Add Payment Gateway Icon
If you want to add Payment Gateway icon please follow below steps:
- Add something to your cart and go to
view cartpage. - Scroll to Payment Details box and inspect payment gateway to which you want to add the icon. Find there
check-iconelement. Name your icon just like content ofdata-gateway-icon-nameattribute.
![]()
- Go to
templates/lagom/core/styles/your_style/assets/img/gateways/and place there your icon.
![]()
- Now Payment Gateway icon will be displayed
![]()
Add custom CSS file
TIP
In Lagom theme you can easily add your custom styles without worrying about being overwritten at the next update.
If you want add custom style please follow below steps:
- Go to
templates/lagom/core/styles/your_style/assets/css/and createtheme-custom.css - Add your css rules
- Enjoy your custom style
If you want you can also minify your style or add additional rtl language stylesheet. It should be named theme-custom-rtl.css.